 If you're part of my email list, you'll know that I was approached by Interact to become a partner in their online quiz builder platform. A lot was happening for me that week in the blogging world, so I was starting to become (and I think you'll agree) kinda, well, skeptical.
I'm going to show you the real story, that Interact is the best online quiz maker available, and how you can actually use it to grow your business!
Don't worry, if you're not a part of my list and hate missing out on what I'm talking about, just join here. Access to the full resource and lots of freebies, give-aways + more included at no cost to you!
After talking to my representative and learning more about Interact as a company, what I was being offered, the quiz builder tool, and how I would “pay” for my pro membership, I thought I'd take the plunge!
*I'm not being paid by Interact to write this, however, I am offered their PRO plan for free.
What does this mean for you?
Quick Navigation
Interact is a web-based quiz builder with all sorts of proven features + benefits!
My favourite features + benefits (why I think Interact is the best online quiz maker available):
- Over 100 fully customizable, high converting templates across 3 different quiz styles
- Ability to create a quiz from scratch
- Simply add your logo to the entire quiz
- Easily update templates to match your brand
- Polls + giveaways now added! (also from scratch)
- Super easy integration, including a WordPress plugin – great for the non tech-savvy like myself
- Pairs with all the major email marketing service providers, like ConvertKit
- Easy to use and intuitive quiz builder interface + quick menu
- On screen analytics + conversion tracking
- Another way to grow leads, sales, business, social presence
- Opt-in email form builder
- Built-in Social Sharing
- Embed on blog posts, social media, emails, etc.
- Live chat assistance
- Branching logic for more personalized quizzes
- Built-in stock photo searching
*I've launched my first Give-Away with Interact! Be sure to get entered in for your chance to win!
[interact id=”5a7b5bcdd9ef560014369c10″ type=”giveaway”]
Related Posts:
ConvertKit Email Marketing (click HERE for the absolute best email marketing provider you will ever use)
Bluehost web hosting overview – Don't try anything else.
Tailwind Tribes
Why you need an online quiz builder like Interact
- Increase your page views
- Up your followers on social media
- Convert site traffic into email subscribers
- Grow your business
- Add profit to your ledger
Now that I've told you WHY you need an online quiz builder platform, let me show you how to create your first quiz with Interact! In my opinion, Interact is simply the best online quiz maker!
Step 1: Sign Up
Go ahead and click over to Interact to start your free online quiz maker experience.

Now that you're a member, it's time to build your first quiz with the multiple choice quiz maker!
Step 2: Choose your quiz type
Once you log in, you'll be taken to the dashboard. It's a very simple screen with just a few options to choose from. Navigate to “CREATE NEW QUIZ” to start building.

You'll be asked if you want to start from scratch or use a template (I recommend checking out the templates first).
Now select all categories that apply to your business. For the sake of this post, I'm just going to choose Family + Parenting. Hit the “GO TO NEXT STEP” button at the bottom of the screen.
Next you'll be prompted to choose your quiz type.
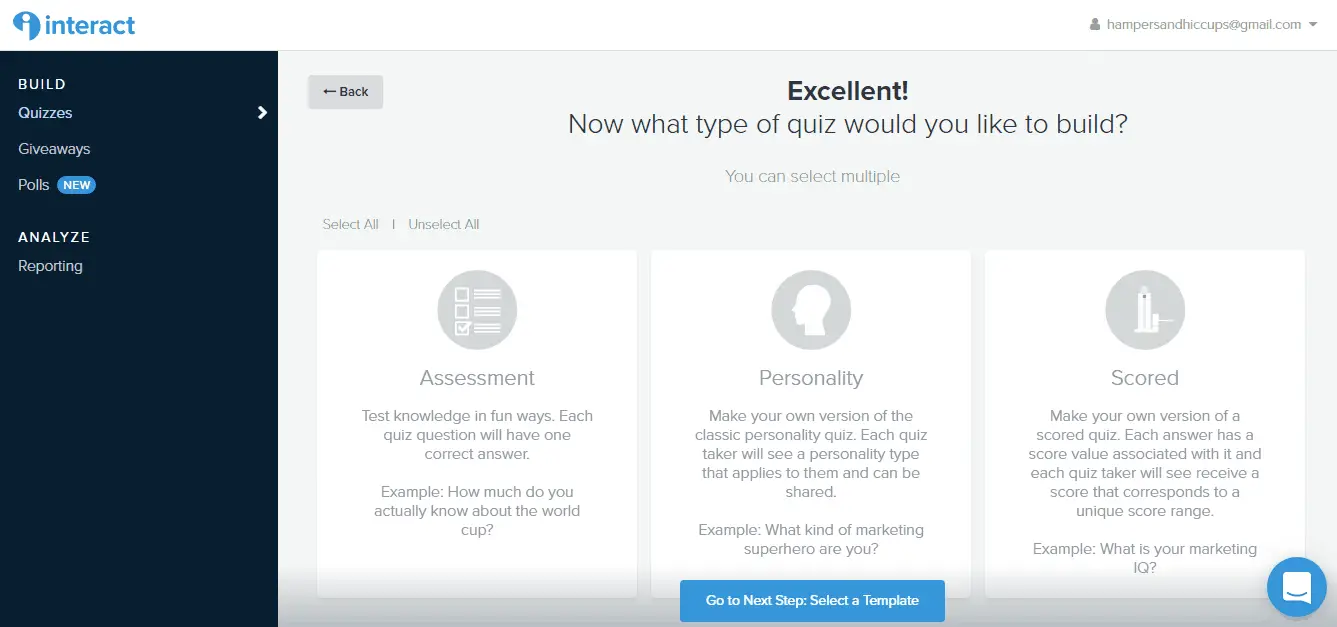
As you can see, there are 3 different options. Each choice will give you relevant fun interactive quizzes to choose from. For my demonstration, I've chosen Personality, so I'll be taken to the personality quiz maker. (You can choose more than one in this step).
Go ahead and choose the actual quiz that you're interested in. You can sort by conversion rate or alphabetically. You'll be able to preview each quiz first by clicking on the picture. I'm going to select “What Type of Mom Blogger Are You?”.
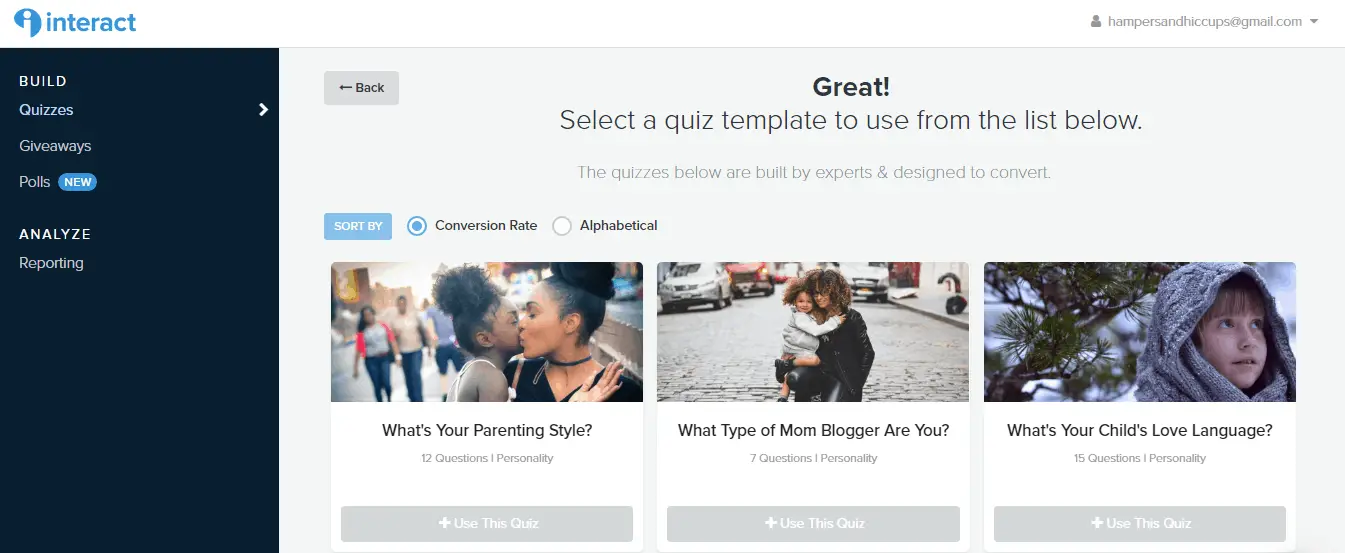
Now that you've chosen your quiz, it's time to make it your own.
Step 3: Customize
You're now in the quiz builder platform. I'll admit, it's a bit overwhelming at first. Let's break it down into manageable tasks, starting with the quiz itself.
Customize the Questions
What I recommend doing first is going through the quiz, page by page, and deciding if there's any questions you want to delete. A good number of questions is 7. You' don't want users to lose interest and click out before they get a chance to drop their email. You can delete questions by scrolling to the bottom of the left sidebar. There you will see a little gear beside each of the questions. Click this to delete. Similarly, go ahead and add pages as you see necessary. Once you've done this, go back and change any pictures and wording to make it your own. All you need to do to change an element is click on it. Easy Peasy.
Note: if you've changed answers, or just to double check, you'll want to navigate to the “Results” heading. Here you'll also be able to redirect any and all results to a specific url if you so choose. There's also a really cool function with “Branching Logic” where you can send users to different questions dependent on their answers.
Brand It
Toggle from “content” to “styles” in the left sidebar menu.
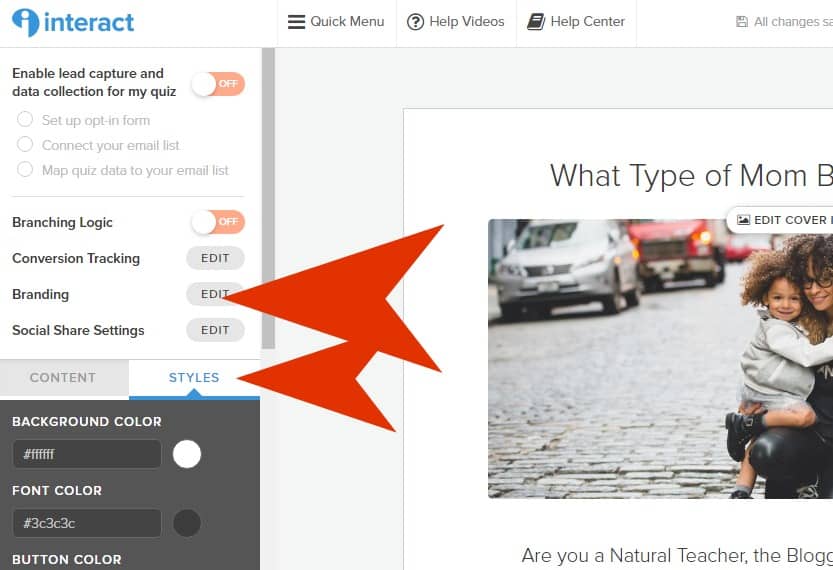
Continue down the menu, filling out your colours and fonts (Google fonts are built in). At the bottom there is the option to add your logo to each and every page. Do it.
[interact id=”5a70da70dae63c0014af3a0c” type=”quiz”]Set up the email opt-in form to benefit your business
At the top of the left sidebar you'll notice a button regarding lead capture. The default is to have this turned off. You're going to want to turn this on to grab subscribers. Start with the opt-in form and follow the prompts given – it's super easy!
Hint: you probably only want to add email and first name to your form, anything more and people get leery. But that's not all – there's also an option to allow users to skip the opt-in. It's recommended that you add this little gem.
Once you've customized the opt-in form itself, you'll be prompted to connect your email marketing provider. I use ConvertKit. There's also the option to upload your .csv file if you prefer.
Your can read about my ConvertKit experience HERE.
Also, if you're not using bluehost for your web hosting, you're doing it wrong. Switch RIGHT NOW and get it for just $3.95/month!
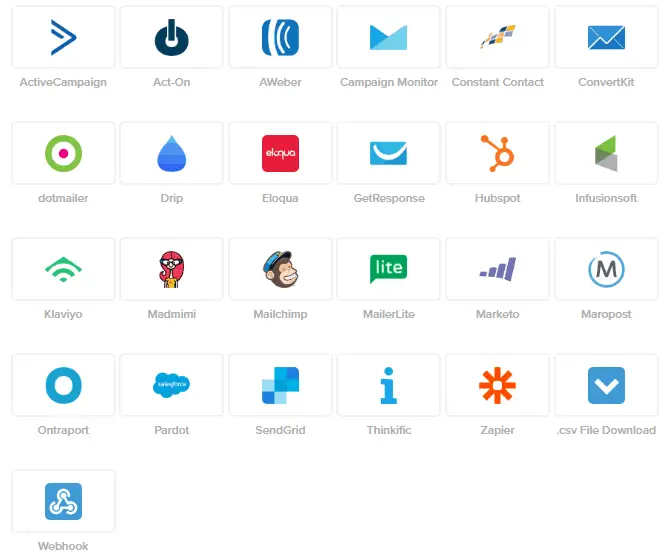 After you've connected your email marketing provider you'll be taken to a trigger page. Now the real work comes in.
Step 4: Connect
You're now going to need to make the quiz connect to your email marketing provider. The whole “interweb” thing still amazes me.
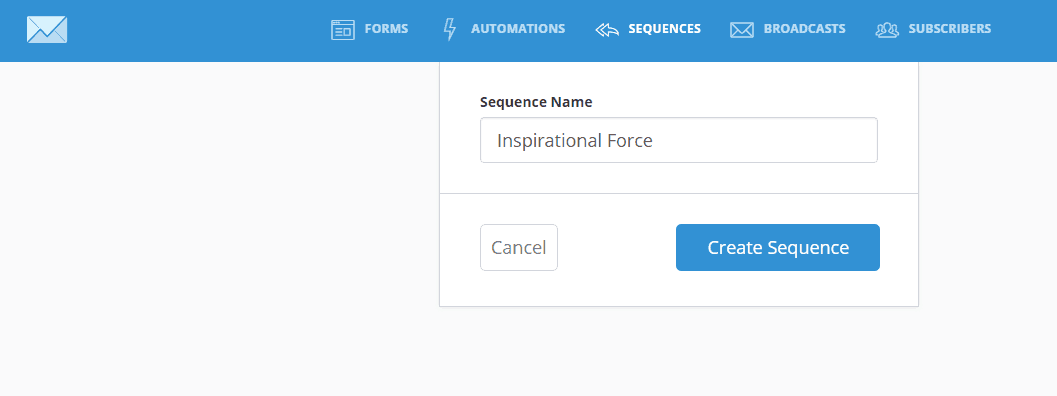
Go into your email marketing dashboard and create a sequence for each of the quiz results. Ex. My quiz results are 1) Inspirational Force, 2) Blogging Bestie, 3) Natural Teacher, so I need to make three series: 1) Inspirational Force, 2) Blogging Bestie, 3) Natural Teacher. Leave them empty for now, you'll get to that in a minute.
Head back into the Interact Quiz Builder and navigate to that trigger page we just left. You'll see there's an option to add an action. Click on there. From the sequence section, find your new sequence in the drop down menu, connecting each result with the sequence you just created for it.
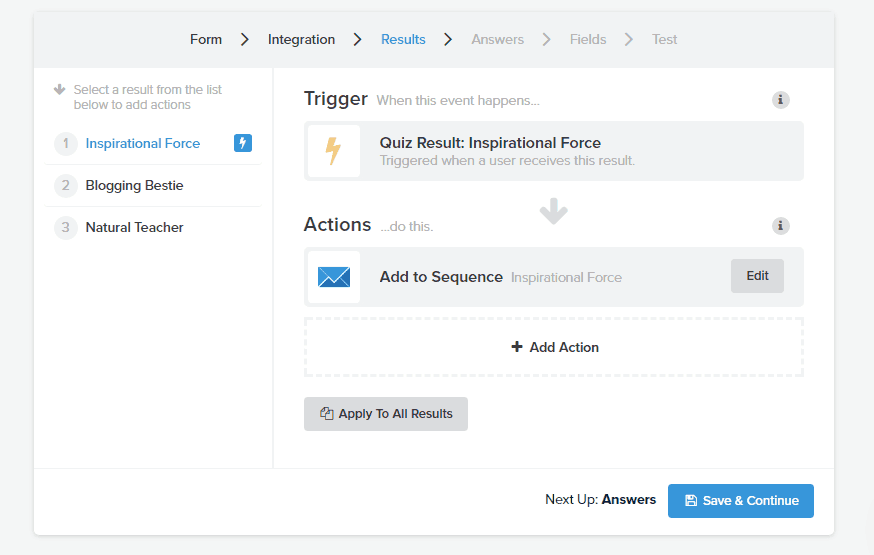
Once you've completed that, you'll have the option to add a sequence, form or subscriber field to each individual question. For the purposes of this tutorial, we'll leave that out, noting that it would be the same steps as connecting the results pages.
After you've approved the email format, it's time to test the integration, it's as easy as click, click, clicking.
Now go into your email marketing platform and fill out the sequence. You can get the basic email templates by subscribing here.
Simply copy, paste and customize. I can't emphasize this enough; the web-based relationship between ConvertKit (and others) and Interact is auto-updating, so there's no need to reconnect your sequences.
Step 5: Socials + Embedding
Great! You're quiz is just the way you want it. Now you can send it out to your audiences! But first you need to make sure they're able to spread it around, too. Navigate to the social share settings in the left sidebar of the quiz builder. Add a page for users to be led to and customize to your liking.
On the top tool bar, over on the right hand side, there's a button to “</> Share and Embed”. Simply click that, choose which type of connection you want (tip: choose more than one), and integrate it with your website text, or download the WordPress plugin for even easier additions! Again, this is all auto-updated.
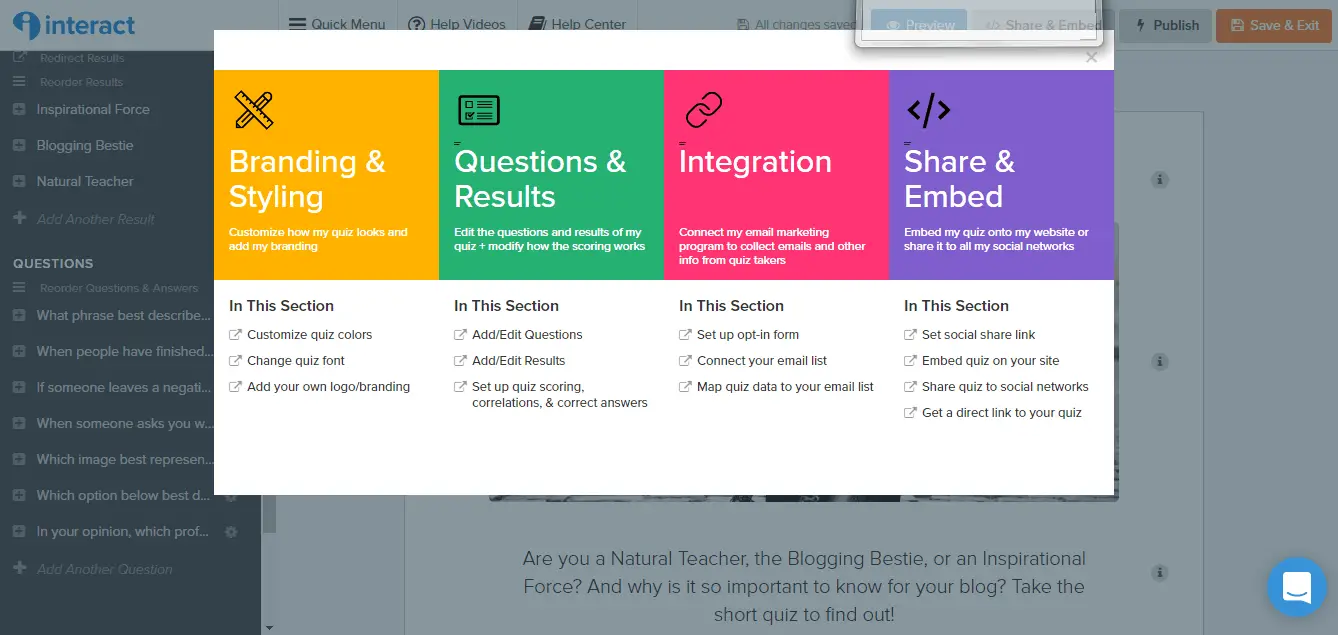
Ok, so I showed you the step-by-step guide to the customizable quiz builder. But, what if I told you there's an easier way? You may have noticed an option on the top tool bar for a “Quick Menu”. Honestly, this thing is genius. Click on that to bring up literally anything you need! It saves hunting around for the right page. Also, when you click an option, a little circle shows up on the quiz builder to show you where to find the setting without the quick menu. Brilliant.
Now all that's left to do is promote your quiz and watch the subscribers roll in! To see how your quiz is doing, simply head to the interact main dashboard and click the analytics for your quiz. One of my favourite analytics – you can see which question users dropped off at, allowing you to tweak your quiz to be shorter or more engaging.
[interact id=”5a7bb26750642b001478ad5b” type=”quiz”]I'd love to see what you've created! Leave a link for me in the comments, or shoot me an email.
This content was created by original creator of this website, Katelynn Hegedus.
Did you find this post helpful? Share + Follow me on pinterest + twitter.


