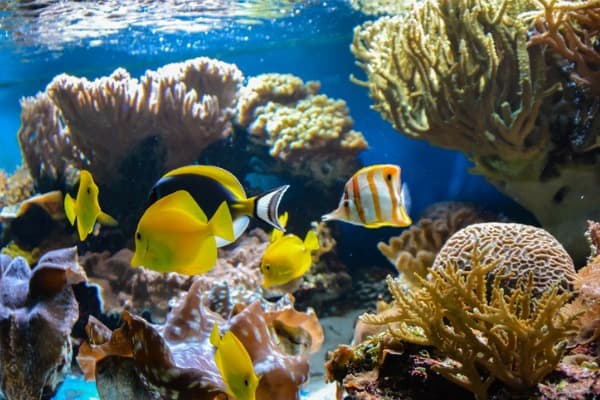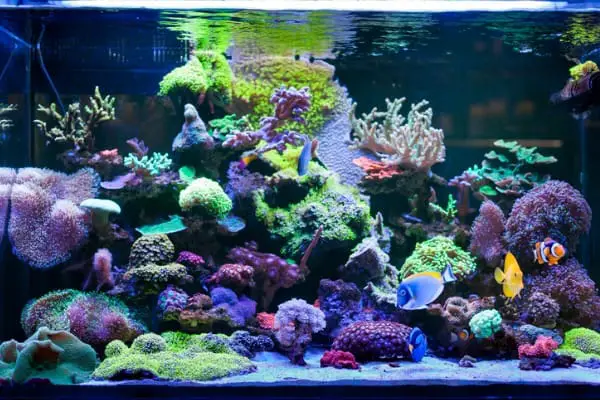
As the name suggests, a nano reef tank is a miniature version of reef and ocean life that can be installed and viewed in your home.
At a smaller scale, a nano reef tank is a saltwater aquarium that showcases coral and marine life at a low cost.
Installing a nano reef tank at your home will not only bring you closer to your passion for aquatic life but also enhance the aesthetic appeal of your room.
Follow these steps to set up a nano reef tank at home –
Quick Navigation
Step 1: Select Equipment and Accessories for Your Tank
The first thing you need is a nano marine tank, which is a bit different than your usual aquarium tank. A nano marine tank usually has a capacity of 14 gallons or more.
The capacity and size of the tank can be deterred depending on the number of fishes and decorative elements you want to add.
You can choose between three sizes – 14, 29, and 40-gallon tanks. Apart from the tank, you will need lights, a heater, and a filter for the aquarium. These accessories are available in any aquarium store in your vicinity.
Step 2: Select a Location in Your House
You need a warm and well-leveled spot in your house to place your aquarium. Pick a spot that is accessible and visible for supervision. The spot should also withstand the tank’s weight.
Step 3: Set up Heating and Lighting
For most aquariums, the top lighting choices are Metal Halides and Fluorescent lights. You must choose your lighting based on the type of reef and color you want.
If your house is located in a cold region, your tank will not get adequate heat. While home heating and sunlight help with temperature build-up, you must invest in a small heater to keep the water temperature even.
Make sure that the heater works, and the temperature is uniform.
Step 4: Choose Inhabitants for Your Tank
The next step is to choose and add livestock to your tank. You can choose among a variety of fishes and ocean creatures such as crabs, fishes, turtles, etc.
Since this is a reef tank, you must also choose and add attractive coral to the setting. Ideally, soft corals are the best choice for nano reef tanks as they are easy to maintain and enhance your aquarium’s aesthetic appeal.
Xenia Polyps, Green Star Polyps, Aquacultured Zoanthid Polyps, Clove Polyps, and Toadstool and Leather Corals are top choices.
Learn about the types of fishes and inhabitants that can be added to a nano reef tank and shortlist the ones that are compatible with your setup. Consider the size of your tank and the type of environment it will provide. Once you finalize and prepare a list, do not buy the fishes just yet; wait until you complete the setup.
Step 5: Set up the Filtration System
Rocks and sand keep the filtration intact. Curvy-shaped rocks are the best as these go well with the coral.
For every gallon of your tank, you will need 1 pound of rocks and 5 pounds of sand. Depending on the capacity of your tank, you will need a Powerhead filter for water circulation.
A submerged filter with a protein skimmer is highly recommended. You may need a calcium reactor in case you choose a stony reef.
It’s time to fill the tank with water and add salt to it. Always opt for freshwater (reverse osmosis) to avoid harmful contaminants that could kill the livestock.
You can purchase the aquarium salt (mostly synthetic) from the store or order it online. When adding salt, read the instructions carefully and use a hydrometer to measure the gravity.
The Powerhead must be placed when the reading reaches 1.023. Before you move on to the next step, make sure that the salt is completely mixed and dissolved in the tank water.
Once the gravity and water temperature are in sync, add the heater. Make sure that the water is stabilized at 78 degrees.
Step 6: Add the Hardscape and Decorative Elements
You can now add hardscape and other decorative elements such as rocks, colorful pebbles, tunnels, steps (in case you decide to buy a turtle), artificial aquarium plants, etc. to your tank.
Do not fret over the patterns and placement as it can be changed after placing the fish. The only thing you must ensure is the leveling and thickness around the tank.
Pour some sand over the rocks and spread it equally in all directions. Finally, wait until the sand settles to adjust the level.
Step 7: Ensure Adequate Cycling
The cycling process is necessary to ensure that your fishes and other livestock have a proper and healthy habitat to thrive in.
This will not only keep the tank water clean but also increase the longevity of your fishes. Basically, cycling refers to the process of cleaning and replacing the old water in your tank to provide a hygienic environment for your livestock.
Before you place your fishes in the tank, make sure that the ammonia, nitrite, and nitrate levels are zero.
While a minor amount of nitrates (up to 20 ppm) is harmless, the level of ammonia and nitrite should always be zero.
Step 8: Add the Fishes and Coral

The last step, which is also the most crucial, is adding the fish and coral to your tank. Be careful when releasing the fishes inside the tank.
Make sure that you have enough food stored for your fishes. Observe them for a few days and note if you see any peculiar signs. Once you add your livestock, cycle the tank water at least once a week.
By following these steps, you can easily set up a nano reef tank at your home and make your space livelier. Pay attention to each step and set up your tank with scrutiny.
More importantly, take your time. Since setting up a nano reef tank can be a bit expensive, you must be prepared accordingly.
Furthermore, it needs a lot of attention and can be time-consuming. If you can dedicate enough time, effort, and money to maintaining your nano reef tank, a nano reef tank is worth the investment.
